
Sailing into Summer - a blog hop from Quilt Block Mania
The theme is summer…. beaches, sunshine, surf, sailing, sand, the heat like a wall, the days long, the days repeating each other bright and warm and golden. My block pattern is a yacht, sailing out into the blue. It evokes for me friends and freedom and the joy of the moment. I have a few friends who sail, and each time I’ve been out with them, it’s been magical.
I first went sailing with a boyfriend in the sounds in New Zealand. I’ve always loved the sea, but adding the speed of sail, and feeling like you were together at one with the natural world was just awesome. Sitting in the bow of the boat and getting periodically drenched was also …. memorable.

Many years later, sailing with another friend in Australia, we were coming in, and seeing our children playing in the surf, we thought we were in the shallows. We jumped in so we could pull the boat onto the beach and found ourselves completely out of our depth. So, we swam the boat in. The kids thought it was hilarious.
I still treasure those moments, and my block is celebrating the joy of the wind in the sails and the water slapping the sides of the boat in a summer that never ends.
The block is made by foundation paper piecing.
Firstly, be aware that the templates to cut the fabric are not reversed, so you place them on the right side of the fabric, but the fpp sections are reversed because you place the fabric on the wrong side of the fpp sections. I print out all templates on paper, but some people like to use the fpp sheets which dissolve for the fpp sections. This means they don’t have to tear out the fpp paper at the end. Others like to use a thinner paper that is easier to tear than standard photocopy paper. Another way to make paper easy to tear is to use your pattern tracing wheel to make a dotted line along each seam line. It all helps.

Fpp templates are the reverse of the block, because you sew on the unprinted side.
So, I cut the templates, and cut the fabric, keeping each template with the fabric. If the template has an edge which is on the side of the block, I usually give the fabric an extra quarter inch seam allowance on that side. This is so when the block is assembled, I can cut it back to the right size easily. Then just to help with placement, I use my light box or carbon paper to mark the corners of the seams on the wrong side of each piece of fabric. This just helps me with placement.

Keep templates with fabric. Cut edge fabric a little wider at that edge for seam allowance.
Then I cut the fpp templates and fold along each seam line. This is for two reasons: firstly, it lets me check my fabric placement. By folding the template along the seam line, I can see if I have placed the fabric correctly. Secondly it makes it easy to rip the paper off when I’m finished sewing.

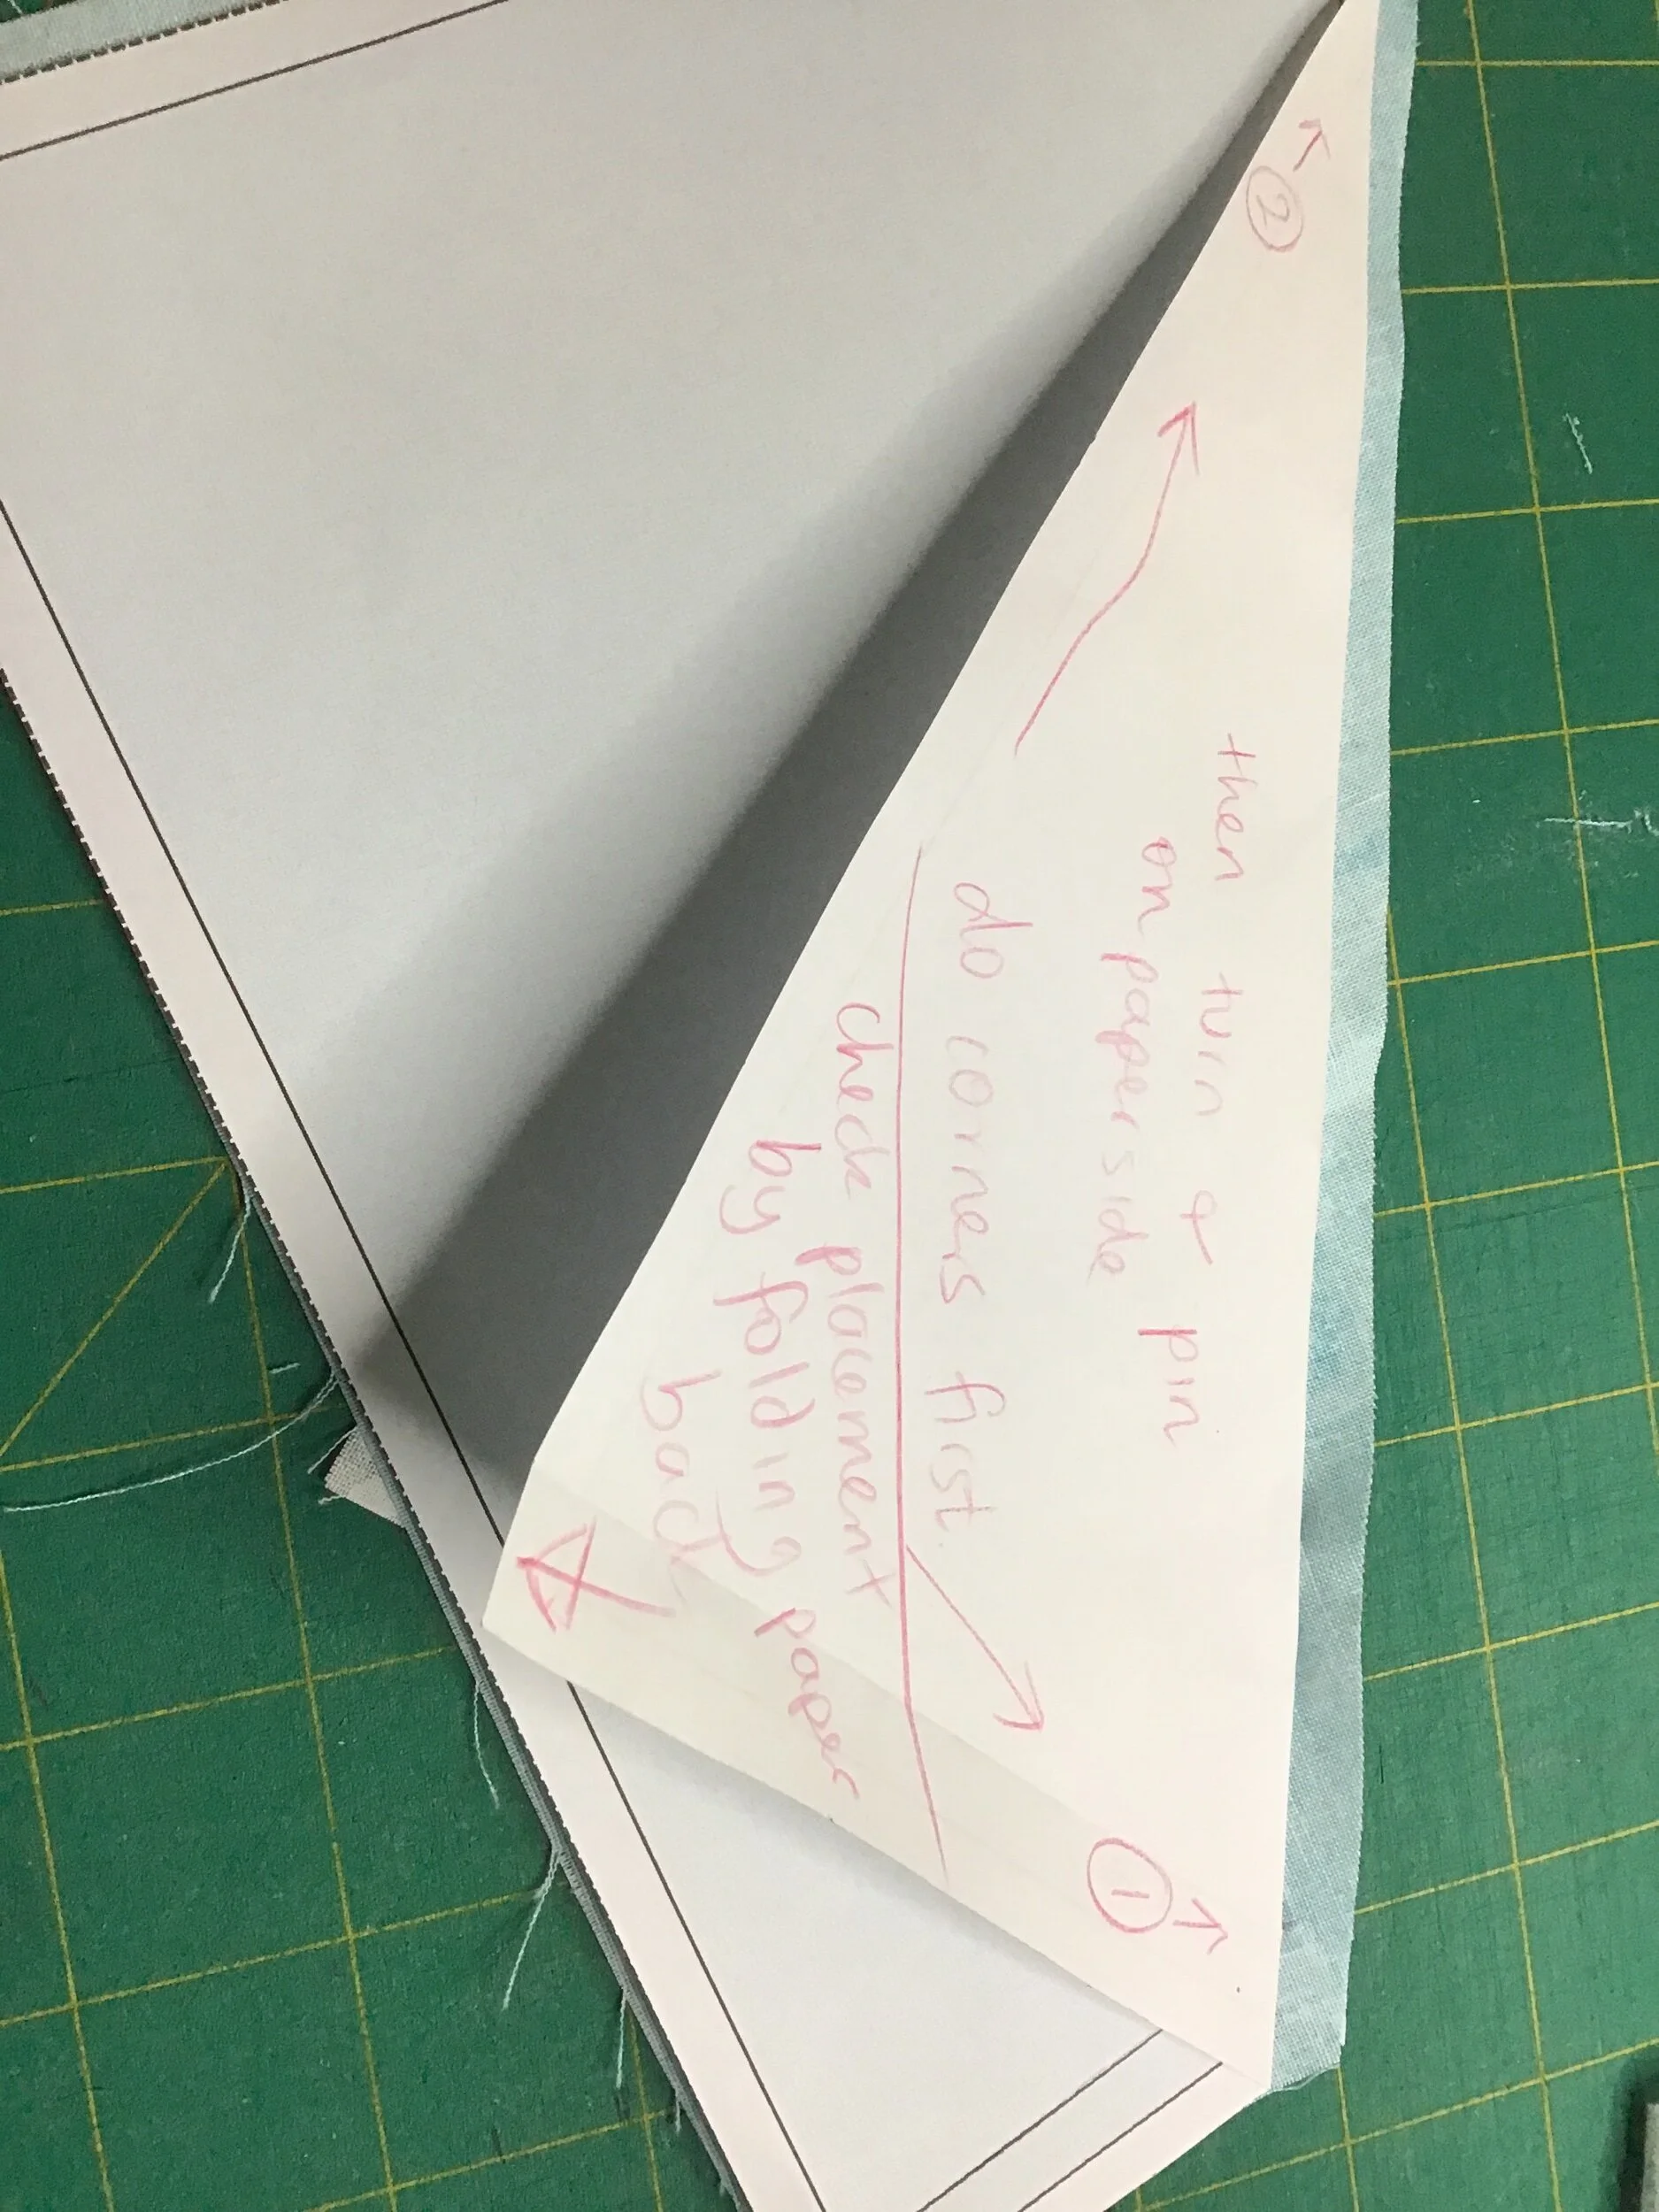
Back and front: Pin the second piece right sides together on the back of the paper. Then flip the paper and pin on the front of the paper because this is the side you will sew on.
On each section I place the first piece of fabric, on the back of the fpp section, right side out. I then pin the second piece of fabric on top of the first piece, right sides together, aligned along the seam line I’m about to sew. Now to position that second piece of fabric, I make sure a pin goes exactly through the corner of the seam on the paper and the mark I made on the back of the fabric.

Put pin through at corner marks first, then pin on paper side.
I also fold the fpp section back along the seam line so I can see the fabric matches onto that folded back section.
By folding the paper back, I can see if it matches onto the fabric I just pinned. If they match, I’ve got it in the right place.
I then pin on the printed side of the paper.

Ready to sew on the paper side.
After double checking the placement, I sew along the seam line using a slightly smaller stitch, starting before the sewing line and ending after it finishes. The smaller stitch makes it easier to rip off the paper and stops the stitches ripping out. Then I press the seam before I add another piece of fabric.

Sewing along the seam line.
This step gets repeated until all the sections are complete.
The next step is to sew the sections together. Paying attention to the order they go together, it’s relatively straightforward to match the right sides together, check the seam intersections meet and sew down the seam. I do pull out the paper in the seam allowances as I go, but I leave the rest of the paper in. Once the block is finished, I trim it to size.

Sections pinned together, ready to sew.

Back of block before paper is removed. I tear paper out of the seam allowance as I go.
… and here it is, sailing into summer.

I hope you enjoy this block. Do let me know your fpp tips. I’m always wanting to make the job easier!
Here is the link to my patterns
Here are links to all the blocks in the Quilt Block Mania Summer Series:
Camping Tent by Carolina Moore
Beach Umbrella by Jennifer Fulton
Flip Flops by Becca Fenstermaker
Summer Cocktail by Marian Pena
Beach Ball by Laura Piland
Popsicle by Sherry Shish
Curvy fish by Velda Roy
Angelfish by Lisa Amundson
Bucket and Shovel by Heidi Pridemore
Wonky Beach Umbrella by Jamie Siel
Starfish by Leanne Parsons
Sailboat at Sunset by Glenda Wilder
Yacht by Sue Griffiths
Food/Ice Cream Truck by Laura Strickland
Crab by Afton Warrick
Sleeping bag and star by Sarah Vanderburgh
Funky Flower by Kathryn LeBlanc
IceCream Cond by Sarah Marcina
Sunglasses by Celine Perkins
Sun by Charisma Horton
Hello Summer by Amarar Creacions
Tall Ships by Kris Driessen
Life Saver Preserver by Sandy Fitzpatrick
Dragon Fly by Julie Luoma
Up in The Air by Judit Hajdu
Surfboard by Susan Arnold
Beach Treasures by Linda Bratten
Two Scoops by Shari Butler
Free to Fly by Marcea Owen
